How to draw a realistic dog
Learn a Few Techniques on How to Draw a Realistic Dog
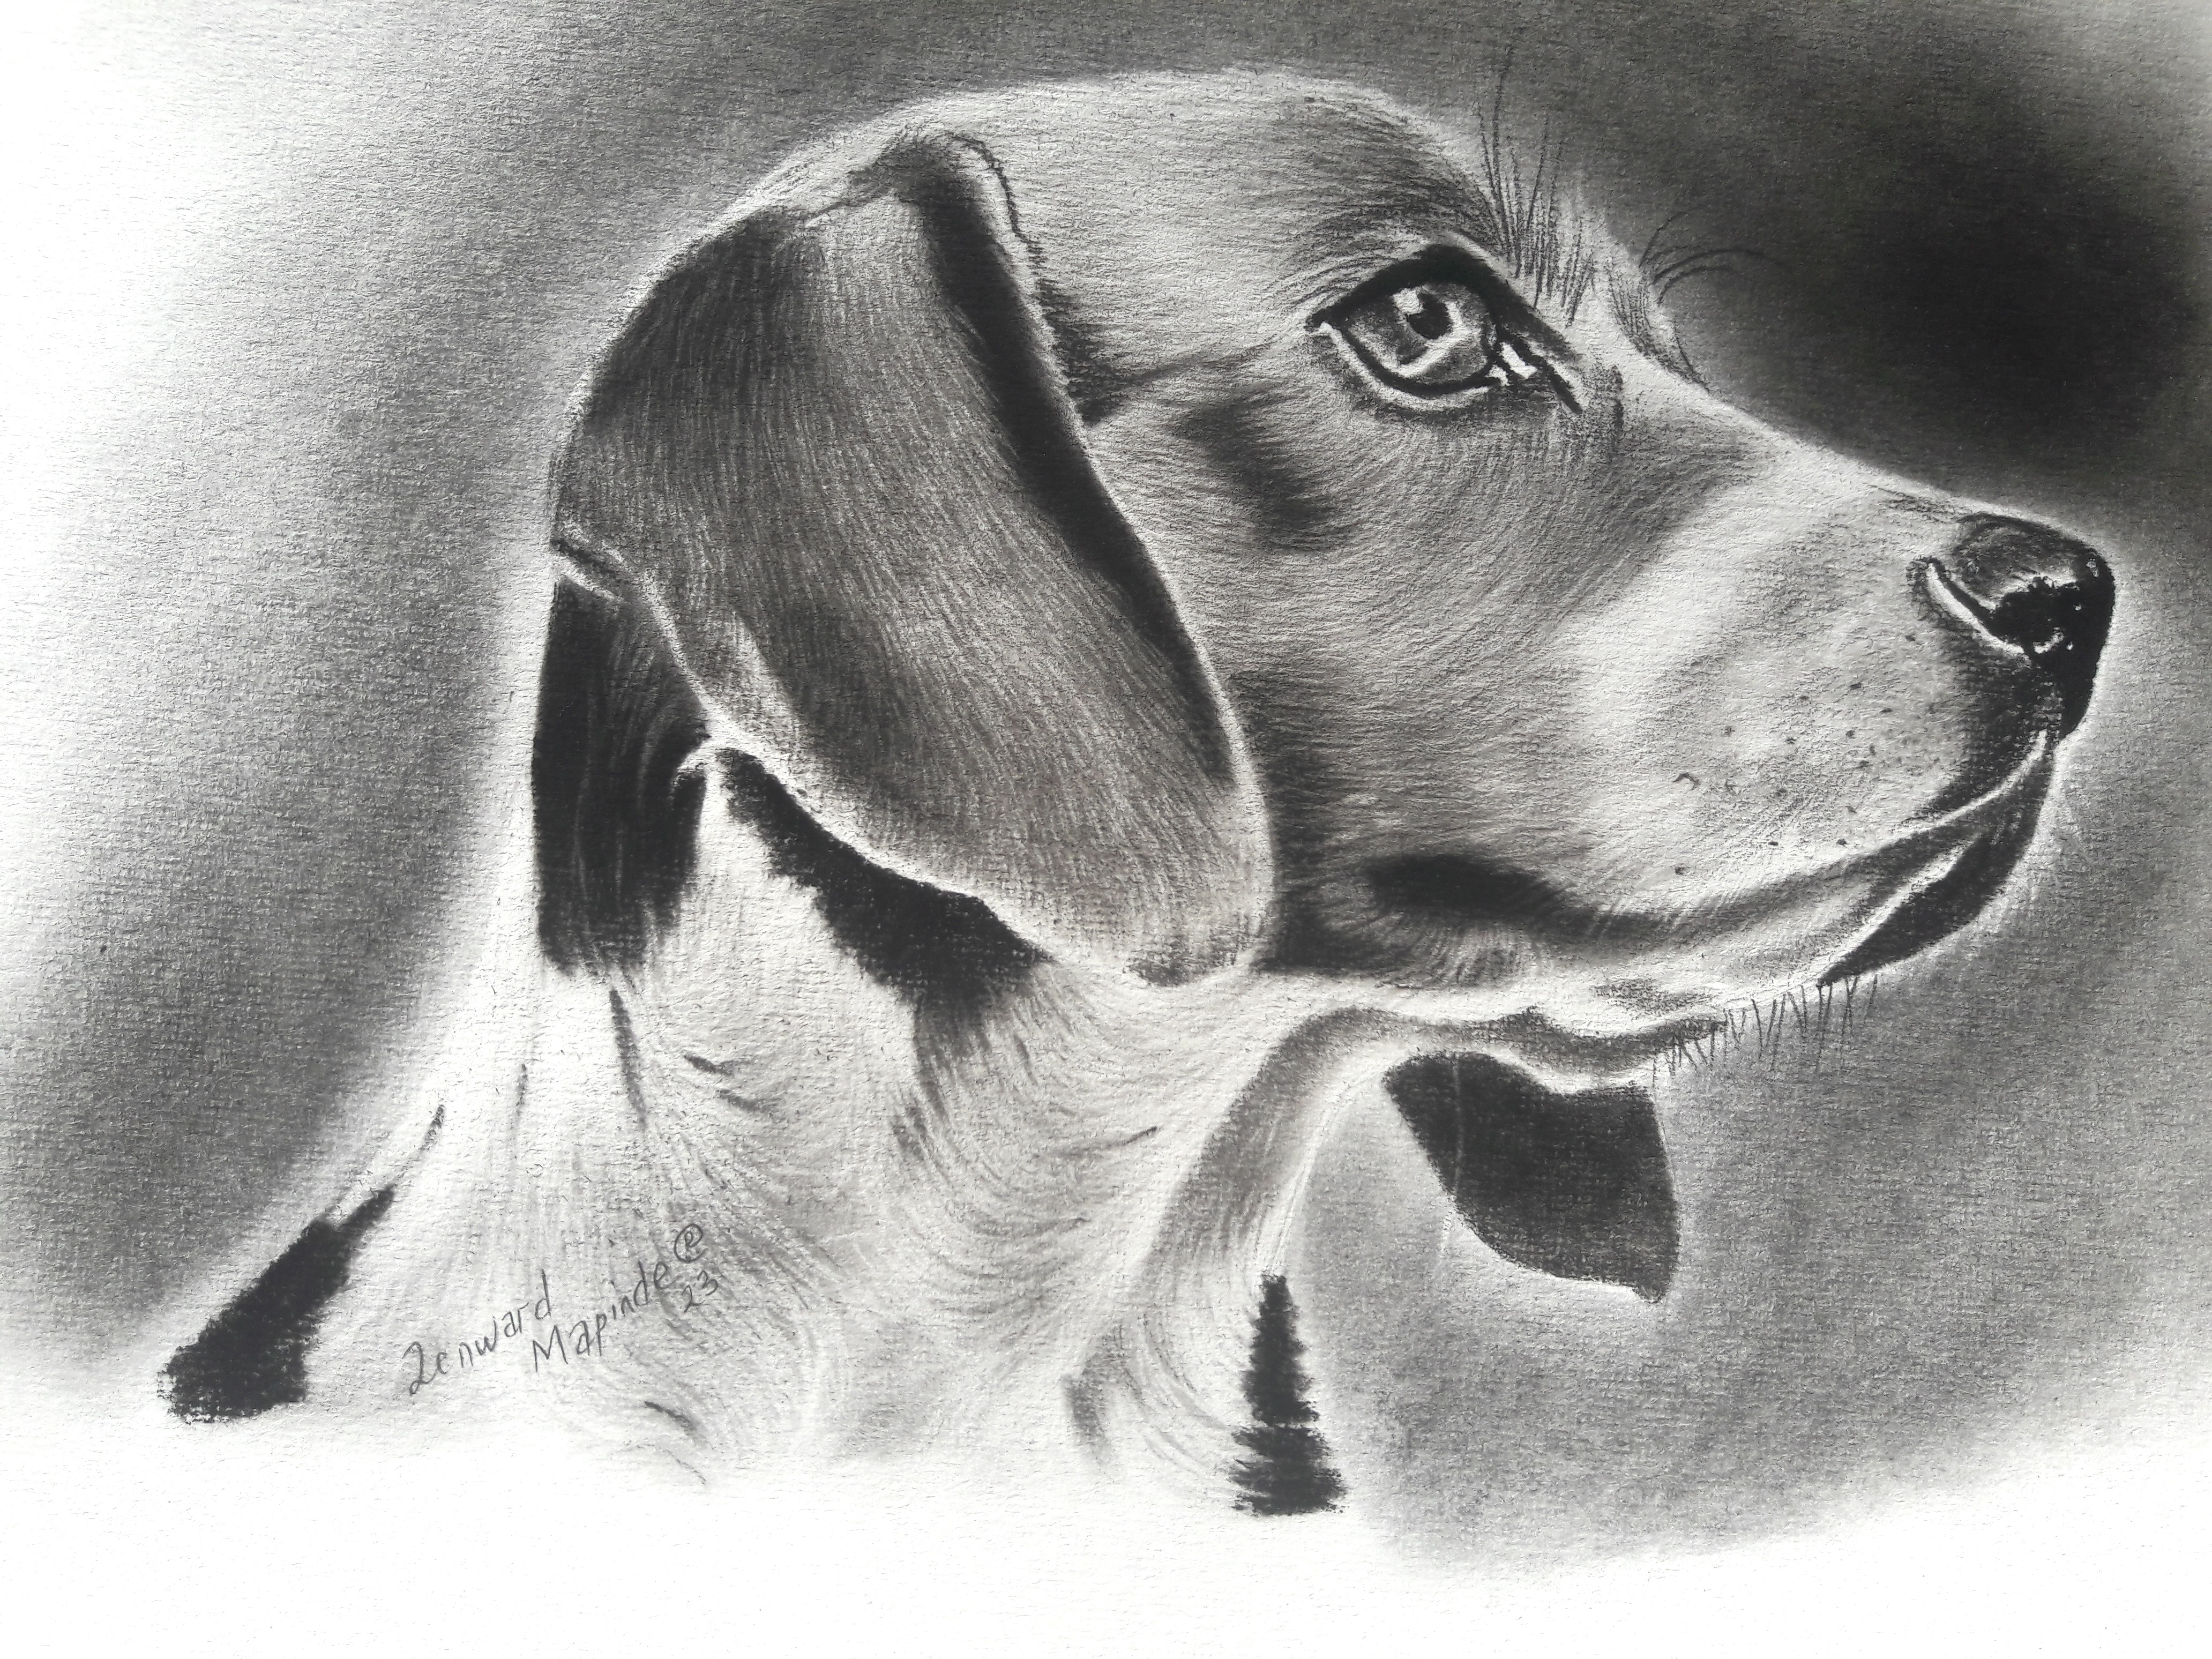
By Lenward Mapinde
We all love dogs, don't we? Well, get your pencils and learn how to capture and immortalize the cuteness on paper with a bit of help and practice. The tutorial or techniques covered here do not only apply to this particular breed but may be used to draw many if not all breeds out there.
Draw a Dog
Level: Easy
Basic materials you'll need:
Charcoal pencil (for shadows- any brand should do)
HB pencil (for sketching)
White Eraser
Kneaded Eraser
Soft brush
Let's dive right into it...
1. Sketch your main features out

Block (sketch) in the basic features of our dog ie eyes, nose and mouth. To get better proportions I highly recommend drawing very faint horizontal and vertical guidelines to help you align everything out.
Work to refine your block-in until you have a basic contour.
2. Lightly Shade

Once you have everything in the right place, clean up the sketch by erasing your guidelines (we're going to draw over them so if you don't want to erase them just yet don't worry).
Now the real fun begins... Begin shading the fur and features. For the darkest areas of the dog, like the eyes and nose, use a charcoal pencil or any darker graphite grade at your disposal.
3. Define the Texture

The texture of your dog really depends with the type or breed you're drawing. For our exercise the fur is short and straight hence it is different from, say, a poodle’s curls. However, regardless of the type of fur you’re drawing, always shade with directional strokes (follow the direction of the fur) using a medium dark pencil.
NB: When drawing fur or hair never get caught up trying to draw all of them individually.
As you work, build up the tone bit by bit and to capture details and define darker sections of the fur you have to increase your pressure. For even darker shades I recommend using a charcoal pencil or a 6B graphite pencil.
4. Blend in everything together

Use your blending stump or soft brushes for this process.
5. Use your Erasers

If you have a pencil eraser now is the time to make use of it. Create highlights according to the direction of the fur you put with your pencil. You can also use a putty or kneaded eraser for this. Mold a kneaded eraser into a thin point and gently stroke it over the shaded areas of fur. This picks up a little bit of charcoal/ graphite and makes the fur even more real and lifelike.
6. Add the Final Details

Keep working on the fur using your pencils and erasers until you’re satisfied with the results.
NB: Avoid over detailing the drawing.


How fantastic Lenward, cheers from Oz!!
ReplyDeleteThank you so much.
Delete